Add a Busy Time
Appointments can be scheduled from the Dashboard, the Calendar, or the Clients section while viewing a client profile.
- Click on Calendar in the top menu.
- Click the
 button in the upper left corner, or click directly on the calendar.
 - From the menu that opens up, select Busy Time.
- Select a calendar from the Staff/Calendar menu.
- Choose a Title for the busy time (e.g. Unavailable, Busy, Lunch).
- Select a start date and time for the busy time in the From section, and an end date and time in the To section.
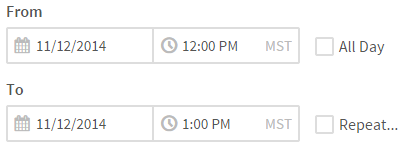
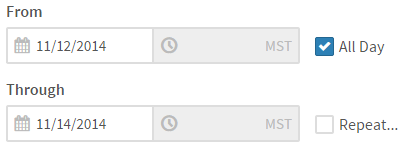
- If the busy time will last the entire day, check the All Day checkbox. If All Day is checked, start and end times do not need to be set.
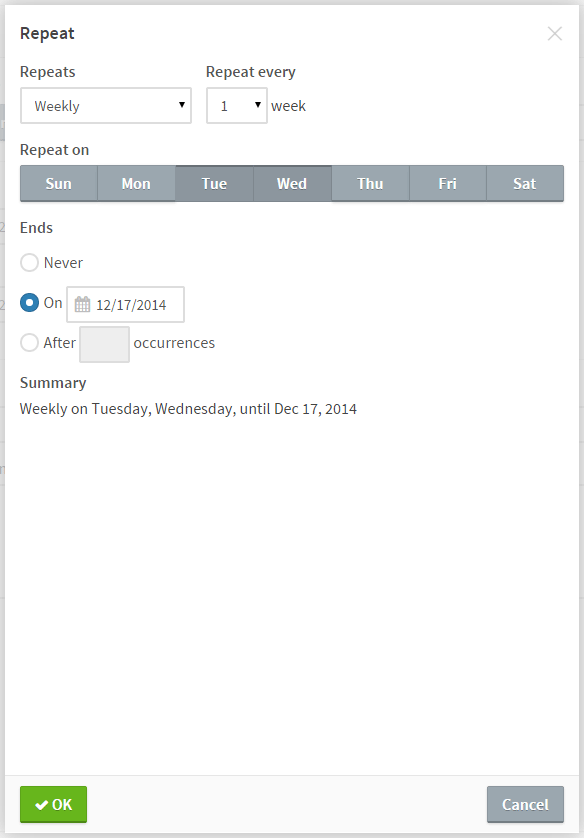
- To make the busy time repeat over a period of time, like once a week or every other Tuesday, check the Repeat... checkbox. Repeating busy times saves you the time and effort it would take to create multiple separate busy times and lets you easily change all events in the series at once. You can see how the busy time will repeat under the Summary heading.
- Finally, click Save.
Blocking Out Time for an Extended Time Period