Add a User
- From the top menu, go to Manage > Staff/Calendars.
- Click on the User Accounts tab.
- Click the
 button.
- Enter a Name to identify the account, an Email Address which will serve as the user account's username, and a Password.
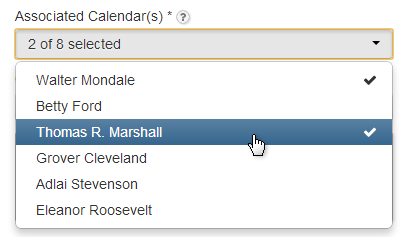
- Associate the user account with at least 1 Staff/Calendar. Click the Associated Calendar(s) dropdown button. Click on a Staff/Calendar name to put a check mark next to the name. Click on additional names to associate more than one Staff/Calendar. If more than one Staff/Calendar is associated, you'll want to set a Primary Calendar as well. The Primary Calendar will be used as the default calendar when scheduling appointments and busy times.

- Then, choose the Default Location that will be displayed to this user when logging in.
- Click the Permissions tab. Select a User Type to determine which areas the user will have access to.
- Restricted: Access only to the Calendar and Clients areas
- Limited: No access to the following areas: Account Settings, Billing Information, Business Information, Email & SMS/Text, Preferences, Custom Labels, Manage Services, Manage Staff/Calendars, Manage Payments
- Standard: No access to the following areas: Account Settings, Billing Information, Business Information, Email & SMS/Text, Preferences, Custom Labels
- Super User: No access to the following areas: Account Settings, Billing Information
- Administrator: No restrictions
- The Managed Calendars feature allows you to choose which associated calendar(s) this user can also manage.
- Finally, click Save.
 button.